For those wondering if you can install macOS Sierra as a VM in Fusion, the answer is: Yes you can!
<rant> It does require a bit of a workaround however. VMware Fusion uses their own custom script to create a temporary VMDK which the VM boots off. They've been using this since Mavericks and quite frankly, it's time to drop their own custom nonsense as Apple has been providing 'createinstallmedia' for a few years now. </rant>
Sep 28, 2017 I recently updated my Mac to macOS High Sierra. Fusion 10 says 'VMware Fusion could not find any recovery partitions on this Mac' when I'm trying to install macOS from the recovery partition. I tried restarting my Mac and reinstalling Fusion and the problem still exists. I wonder if it's because of the new Apple File System. Incidentally, I am running Fusion on an iMac (i7 at 4GHZ with 32GB RAM), macOS High Sierra, etc. I use it for both Windows and Mac virtual machines, including Mac VMs that run prior OSX versions. It always works fine. Also keep in mind, the transition to the new Apple File System (APFS) under High Sierra is technically very significant. Sep 28, 2017 I recently updated my Mac to macOS High Sierra. Fusion 10 says 'VMware Fusion could not find any recovery partitions on this Mac' when I'm trying to install macOS from the recovery partition. I tried restarting my Mac and reinstalling Fusion and the problem still exists. I wonder if it's because of the new Apple File System.
What you'll need:
- Latest greatest macOS Sierra installer (obviously)
- VMware Fusion 8.1.1 (only tested on this version)
- Bit of CLI skills
- Freshly created VM (I just created a custom vm with stock standard settings choosing OS X 10.11 as the type)
Part 1: Creating the installer disk image.
Fire up Disk Utility and create a blank sparse disk image or use 'hdiutil', whichever you like. Size: 6GB.
Mount it (or double-click in Finder to mount):
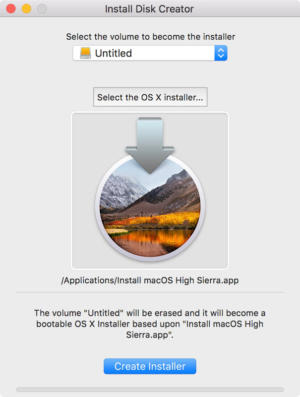
Next use ‘createinstallmedia' from the macOS Installer:

Part 2: Make the vmdk
The newly created install media should still be mounted, if not just mount the macOS_installmedia.sparseimage again.
Before we start, you need the device id of the mounted sparse disk, so run ‘diskutil list’. Look for the volume “Install 10.12 Developer Preview” and note the device id for that disk, in my environment this was: ‘/dev/disk2’
Next we need to create a vmdk, for this we use ‘vmware-rawdiskCreator’. Specify the path so that the resulting vmdk is created inside your freshly created VM’s folder (just simplifies the next step).
What we have now, is a vmdk pointer that refers to our mounted sparsedisk (thus, don’t try and unmount the sparsedisk).
Part 3: Attach vmdk to your VM
Unfortunately you can’t attach an existing vmdk that happens to be a rawDisk, so we need to edit the vmx file for our VM.
Navigate to it, in my case that would be ~/Documents/Virtual Machines.localized/macOS.vmwarevm
Use your favourite editor, such as vi or nano, then add these lines (added mine right below the first set of sata0*** lines to macOS.vmx (or whatever you happen to call your VM):

Save the vmx file
Part 4: Power On
Ignition, launch! All should be working at this point and your VM should be booting up just fine, unless either one of us messed up somewhere along the line.
The parts are simple 3D solids, which can be connected by joints, constraints, contacts, motors, actuators, springs, dampers, forces, torques, or gravity. FreeCAD for Mac is a basic 3D CAD with capabilities.  It is suitable for anyone interested in learning 3D CAD and motion simulation for free before using more sophisticated packages. Educators, students, and new engineers will find it ideal for the teaching and learning of geometry, kinematics, dynamics, vibrations, mechanisms, linkages, cams, machine design, and physics.FreeCAD for macOS allows users to create and manipulate assemblies, which are collections of parts.
Vmware Fusion For Mac High Sierra Mac
Vmware Fusion Crashes Mac High Sierra
Once the install has run through, you can power it off and remove the lines you added in the vmx file in Part 3.
